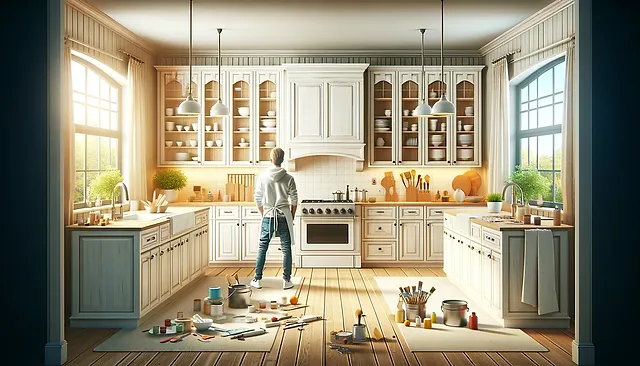
Your kitchen is often the heart of your home, a place where meals are prepared, conversations happen, and family memories are made. However, with time, your kitchen cabinets may start to look dated or worn out. While a complete kitchen remodel can be expensive, cabinet painting offers a budget-friendly way to refresh the look of your space without breaking the bank.
In this guide, we’ll explore everything you need to know about cabinet painting—from choosing the right colors to the step-by-step process for achieving a professional finish. Whether you’re working with old wooden cabinets or modern styles, cabinet painting is a versatile option that can breathe new life into your home.
Why Paint Your Cabinets?
Cabinet painting is a cost-effective alternative to replacing old cabinets entirely. In fact, repainting cabinets can offer a transformative impact for a fraction of the price of a complete remodel. Here’s why painting your cabinets might be the perfect solution:
1. A Budget-Friendly Facelift
Cabinet replacement is often one of the most expensive parts of a kitchen renovation. Painting, on the other hand, can be done at a fraction of the cost. Whether you’re planning to sell your home or simply want a fresh look, cabinet painting provides an easy and affordable way to update your kitchen.
2. Quick Transformation
Unlike major remodeling projects that can take weeks or even months to complete, cabinet painting is relatively quick. With the right preparation and tools, you can have a fully refreshed kitchen in just a few days. It’s the ideal solution for homeowners looking for fast results without sacrificing quality.
3. Endless Color Choices
Painting your cabinets opens up a world of possibilities when it comes to color. You can choose classic white for a timeless look, bold colors for a modern twist, or muted tones for a warm, cozy atmosphere. The beauty of painting is that you can customize your cabinets to fit any style or color scheme.
Choosing the Right Color for Your Cabinets
Before you dive into the painting process, it’s important to select the right color for your cabinets. The color you choose will depend on several factors, including the size of your kitchen, the amount of natural light, and your overall design preferences.
1. Light and Neutral Colors for Small Spaces
If your kitchen is on the smaller side, light colors like white, cream, or pale gray can make the space feel larger and more open. Lighter shades also reflect more light, brightening up the room and giving it a clean, fresh look. Neutral tones are timeless, making them a great choice if you’re looking for a classic aesthetic.
2. Bold Colors for a Modern Vibe
For those who want to make a statement, bold colors like navy blue, deep green, or even black can give your kitchen a modern, high-end feel. Darker colors are particularly striking when paired with lighter countertops and backsplashes, creating a bold contrast that adds depth to the space.
3. Harmonizing with the Rest of Your Home
Your kitchen cabinets don’t exist in isolation—they’re part of the larger design flow of your home. When choosing a color, think about how it will harmonize with other rooms. If you have an open floor plan, consider selecting a cabinet color that complements the paint colors in adjoining areas to create a cohesive look.
Preparing Your Cabinets for Painting
The success of a cabinet painting project is all in the preparation. Skipping steps or rushing the prep work can lead to a subpar finish, so it’s essential to take the time to get it right. Here’s a breakdown of the key steps for preparing your cabinets:
1. Remove Doors and Hardware
The first step in preparing your cabinets is to remove the doors, drawers, and any hardware such as knobs or handles. This allows for a cleaner, more professional finish and ensures that paint doesn’t get onto areas it shouldn’t.
Use a drill or screwdriver to carefully remove hinges and hardware, and label each door and drawer so you know exactly where everything belongs when it’s time to reassemble.
2. Clean Thoroughly
Cabinets, especially kitchen cabinets, tend to accumulate grease, dirt, and grime over time. Before you can paint, it’s crucial to thoroughly clean all surfaces with a degreasing solution. This ensures that the paint adheres properly and that you’re not sealing in any unwanted dirt.
Focus on high-touch areas, such as around handles, and don’t forget to clean the inside edges of the doors and drawers.
3. Sanding for a Smooth Surface
Sanding your cabinets is a crucial step to achieving a smooth, even finish. Sanding removes the existing finish or sheen, creating a surface that the new paint can bond to. Use medium-grit sandpaper for the initial pass, followed by a finer grit to smooth the surface.
If your cabinets have a glossy or slick finish, be sure to sand them thoroughly, as paint may not stick well to glossy surfaces without proper preparation.
4. Priming is Key
After sanding, it’s time to apply primer. Primer helps the paint adhere better to the surface and provides a uniform base for the color. It also prevents stains from bleeding through the paint, especially if you’re painting over dark or stained wood.
Apply a coat of high-quality primer using a brush or roller, and allow it to dry completely before moving on to the paint.
Painting Your Cabinets: Step-by-Step
With your cabinets prepped and primed, it’s time to start painting. Here’s how to achieve a professional-looking finish:
1. Choose the Right Paint
When it comes to cabinet painting, not all paints are created equal. It’s important to use a high-quality, durable paint that can withstand the wear and tear of everyday use. Semi-gloss or satin finishes are ideal for cabinets because they’re easy to clean and provide a slight sheen that enhances the appearance of the wood.
2. Apply the Paint Evenly
Using a high-quality brush or roller, apply the paint in thin, even coats. It’s better to apply multiple thin layers of paint rather than one thick layer, as thick layers are more likely to drip and create an uneven finish.
Start with the cabinet frames and work your way to the doors and drawers. Be sure to paint in the direction of the wood grain for the best results.
3. Sand Between Coats
For an ultra-smooth finish, lightly sand between each coat of paint using fine-grit sandpaper. This removes any imperfections or bubbles that may have formed during the drying process and ensures that each coat adheres perfectly to the last.
Wipe down the surfaces with a tack cloth after sanding to remove any dust before applying the next coat.
4. Reassemble Your Cabinets
Once the final coat of paint has dried completely, it’s time to reassemble your cabinets. Carefully reattach the doors, drawers, and hardware, using the labels you created earlier to ensure everything is placed correctly.
Step back and admire your newly refreshed cabinets—they’re sure to make a big impact on the overall look and feel of your kitchen!
Why Cabinet Painting is Worth the Effort
While cabinet painting requires careful preparation and attention to detail, the results are well worth the effort. Not only does it give your kitchen or bathroom a fresh, updated look, but it also extends the life of your cabinets and adds value to your home. Plus, painting is a much more sustainable option than replacing, as it allows you to preserve existing materials while still achieving a high-end finish.
Conclusion: Transform Your Space with Painted Cabinets
Painting your cabinets is an affordable, effective way to transform your kitchen or bathroom without the need for a costly remodel. By choosing the right color, prepping your surfaces properly, and applying the paint with care, you can achieve professional-quality results that breathe new life into your home.
For those seeking a high-quality finish, working with professional painters like Green Dot Painting ensures that your cabinets are handled with precision and expertise, leaving you with a polished and durable finish. With cabinet painting, you can enjoy a refreshed, stylish space that reflects your personal taste and elevates the look of your entire home.
Keep an eye for more news & updates on DiscoverTribune!


