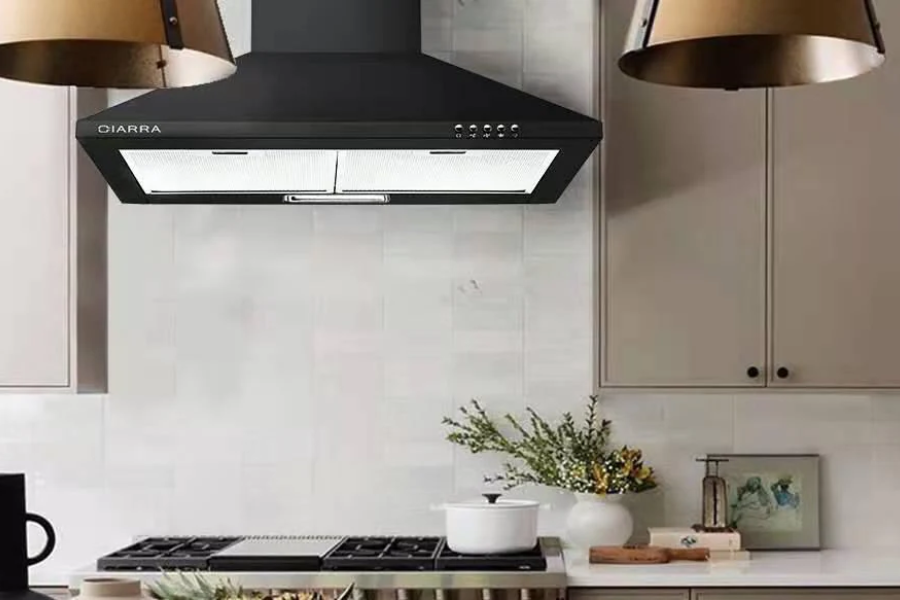
Installing an island kitchen hood is one of the ways that homeowners can add character to their modern kitchens, while still blending the functionality of a kitchen and an artwork. They are suspended above an island stove, improving the appearance of the kitchen besides promoting effective ventilation. However, it is essential for individuals planning to install an island kitchen hood installation in dubai to consider specific factors in order to achieve optimal performance and incorporation. That’s what you need to know about installing an island kitchen hood.
Learning the Basics
Island kitchen hood repairs are designed to be mounted above a cooking island, often in open-plan kitchens where traditional wall-mounted hoods are impractical. They come in various styles and finishes, ranging from sleek stainless steel to classic copper, and are available in different types: ducted, ductless, and convertible.
Ducted Hoods: These take out air through a system of pipes leading outside. While they may effectively remove smoke, steam or fumes, they require proper connection with external outlets.
Ductless Hoods: This use filters to clean the air before putting it back into the room; also known as recirculating hoods. They are easier/cheaper to install but might not be as good as ducted ones.
Convertible Hoods: Ducted or ductless systems can both be used through these thus adding flexibility depending on how your kitchen has been setup.
Plan Your Installation
Planning plays a key role in successful installations. Here are some things one must think about:
Kitchen Layout
Ensure that the size and power rating of your cooker matches that of your chimney stack reasonably well so as it covers you properly without creating any inconveniences when preparing food hereon islands. To ensure optimal coverage, there should be at least 3-6 inches beyond edges on all sides. You should also take into account the height of your ceiling as well as placement of other kitchen parts like cupboards and lights which could affect the setting up.
Ventilation Requirements
Find out the air flow that is required for your cooker hood. It is measured in cubic feet per minute (CFM). In general, a cooking island should have at least 600 CFM, although this will depend on the size of kitchen and what kinds of food are prepared here. To ensure that you comply with ventilation requirements, it is important to follow local building codes or regulations.
Electrical Considerations
An Island hoods needs an electrical outlet which is usually on a dedicated circuit. Confirm if your current electrical system can be able to accommodate this new hood in your kitchen. Engage licensed electricians to do wiring for you so that all electrical connections are safe and compliant with set standards.
Installation Steps
The following are some of these steps not in any particular order but would highly depend on the model of hood that you have chosen and how your kitchen layout looks like;
Mounting Hardware Installation
Firstly, plant the mounting bracket or the ceiling support for this appliance’s range hood. Normally, it means attaching hardware structures to beam/ceiling trusses thereon by anchoring them properly onto those areas with joists or studs attached thereto; therefore, one has to identify where these joists exist through use of a stud finder before securing his/her equipment tightly at such places because it serves as ground work ensuring stability plus proper support.
Hood Positioning
With these brackets already bolted onto their correct positions within the ceiling, then gently lift & lower hoods over such spots hence becoming lighter even though some people might need assistance especially when moving heavier models designed for islands only; however once they’ve been put down safely according instructions from manufacturers who might think about leveling while aligning them rightly.
Connect the Ductwork (for Ducted Hoods)
When installing a ducted hood, you should attach the ducting to the exhaust outlet of the hood. This means that one has to install a duct from the hood up to an external vent, which may be quite difficult in case of islands. Make sure that all air leaks or noise are avoided by securing and sealing ducting properly.
Electrical Connections
Connect the electrical power supply to it. At this stage, you must have a licensed electrician do it who will ensure safety and adherence to electrical codes. All electric connections should be checked for proper functionality.
Install Filters and Finishing Touches
Finally, place any filters needed for your hood such as activated carbon filter for non-ducted models or grease filters in case of those with a duct connection running outside your house. Add on anything else left like ornamental ribbons or lighting extensions to complete setting up.
Maintenance and Care
It is important to note that if your island kitchen hood is not properly maintained then it ceases being useful at all times when required regularly cleaned or changed according to manufacturer’s instructions filters also wiping away grease build-up from its surface.
Make sure there aren’t any obstructions in the path of the ducts used in duct hoods as well as unblocking their outside vents regularly; however, this practice ensures that your cooker remains functional at all times while ensuring optimal air quality within your kitchen environment.
Conclusion
The installation of an island kitchen hood can transform both its utility and aesthetics significantly. By having knowledge about different types of hoods, careful planning for their installations and following directions provided one can set them up effectively. To preserve maximum efficiency regular cleaning ought not only make sure that your kitchens stay clean but also provide pleasurable cooking experience throughout its entire lifetime awaiting years ahead of you by constantly purifying these spaces through keeping these active when they are not being used.
Keep an eye for more news & updates on DiscoverTribune.Org!